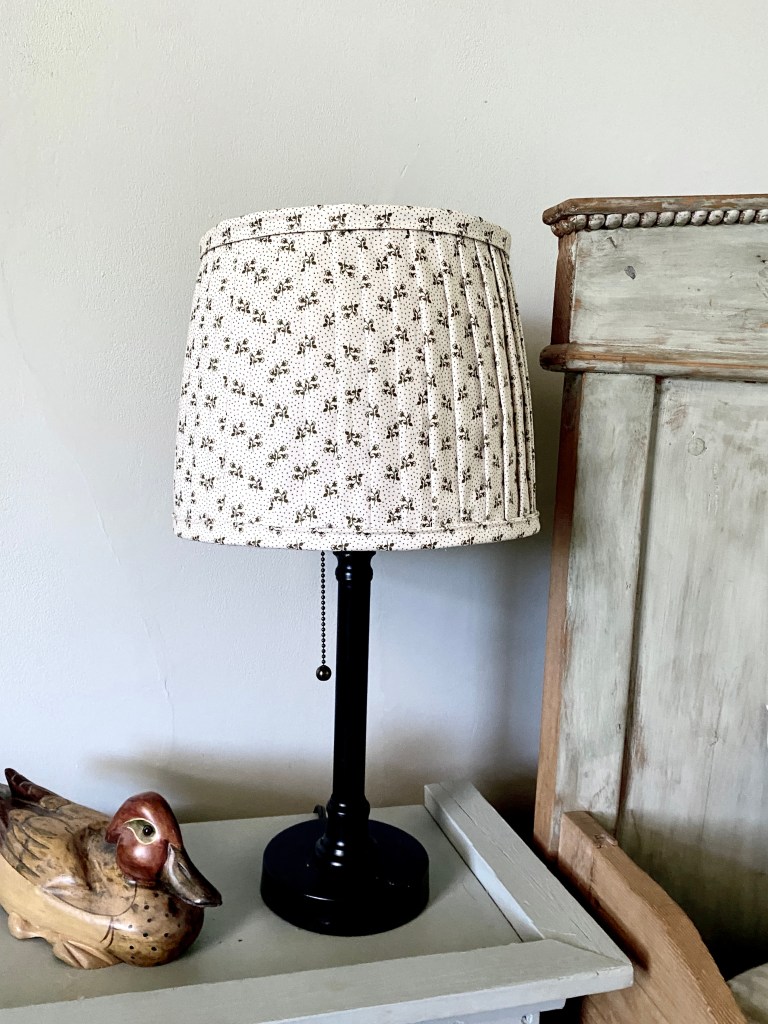
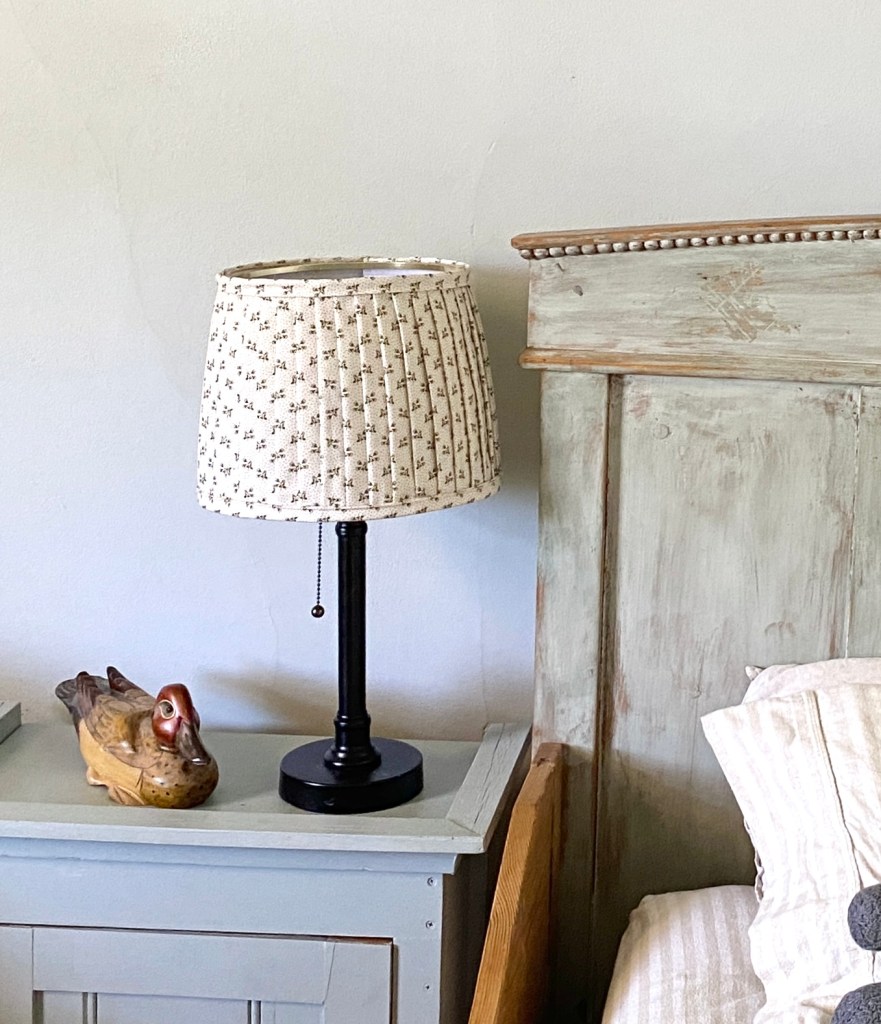
PLEATED LAMPS and lampshades have a beautiful way of adding warmth, character and texture to a room, here’s a super simple way to make one of your own at home.

These lamps look great in all sorts of spaces particularly because of the character they instantly bring. I love the Victorian feel for furnishing our old house. A lot of lamps I found online had more contemporary patterns for the shade, so when I saw this tutorial on Farmhouse on Boone, I thought I’d try it myself.
The lamp I chose to use as a base was this one, because I was after a dark stand to contrast with a lighter coloured fabric. I also love the pull chain. If I was to do the project again, I would have chosen the white shade, as this hessian was a little thick, but it’s still fine and works perfectly well.
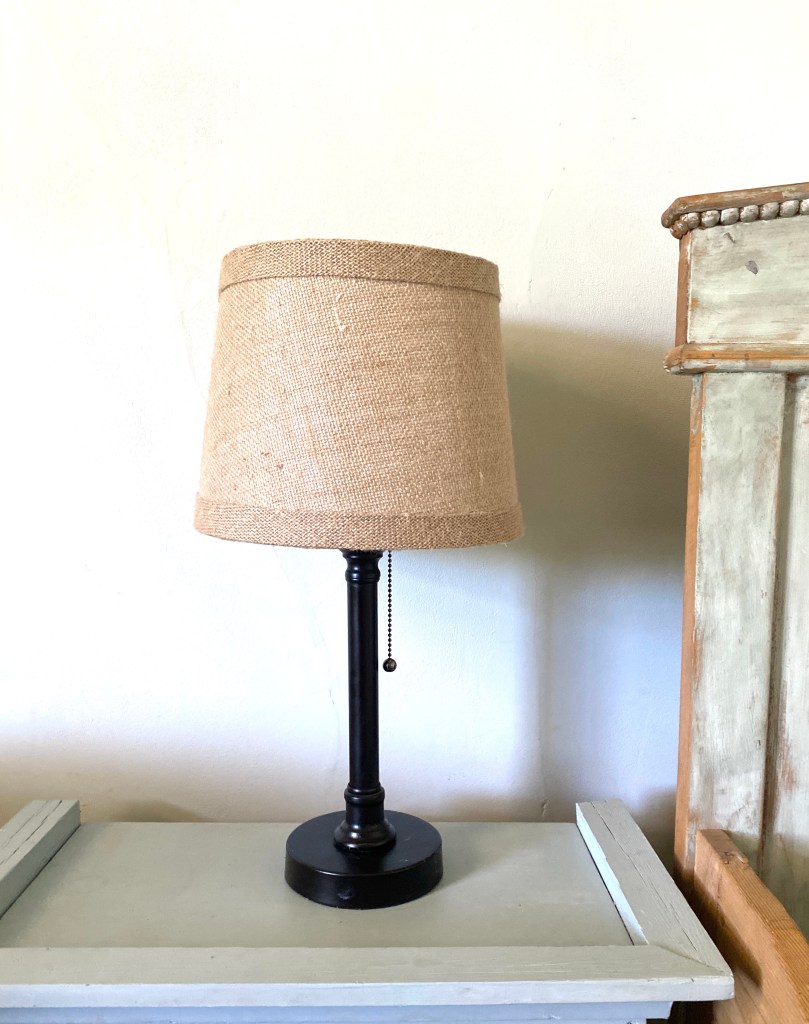
The shade itself is attached to its frame with velcro and has a velcro join at the back, so this made it extra simple to cover, but any lampshade would work fine.
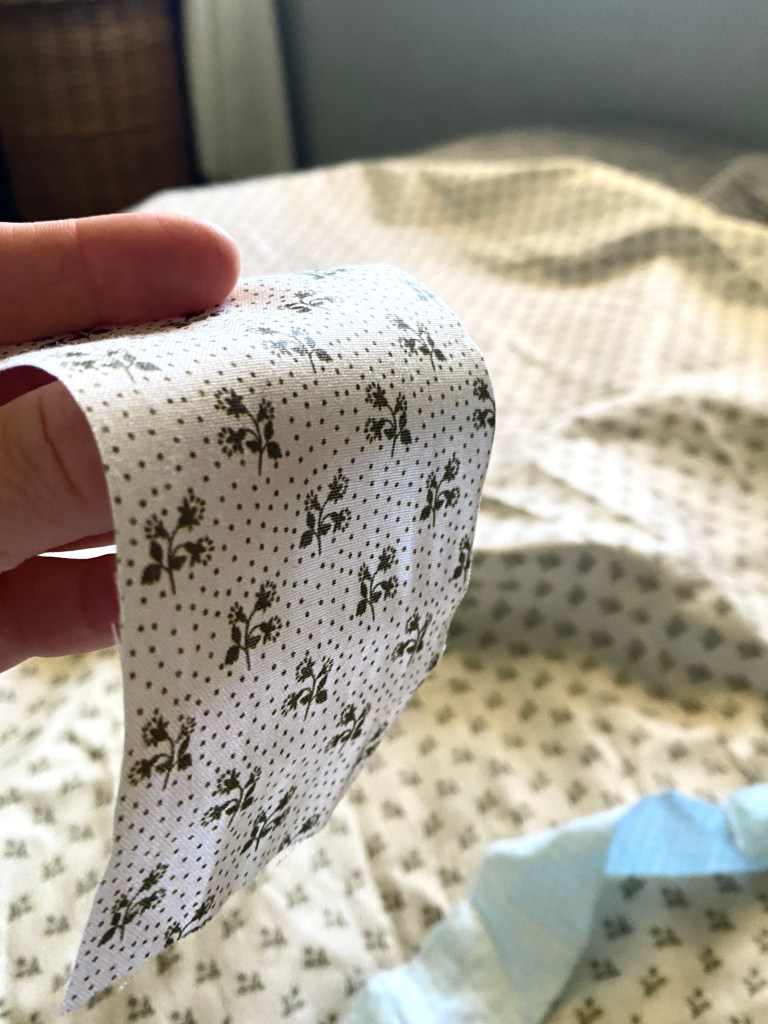
For fabric, I went hunting in quilting shops to find a lightweight cotton that had a simple, repetitive pattern, and I also wanted the pattern too look vintage with an off-white background to add to the overall look. The pattern also helps with cutting, ironing and gluing in straight lines, so I highly recommend some kind of pattern as guide, thought obviously plain fabrics would be fine too.
Quick and easy
DIY PLEATED LAMP
PROJECT TOOLS
- Lightweight fabric
- Hot glue gun
- Pack of glue sticks
- Fabric scissors
- Iron
- Lamp
- Sewing machine (optional)
- Thread to match fabric (optional)
PREPARING THE PLEATS
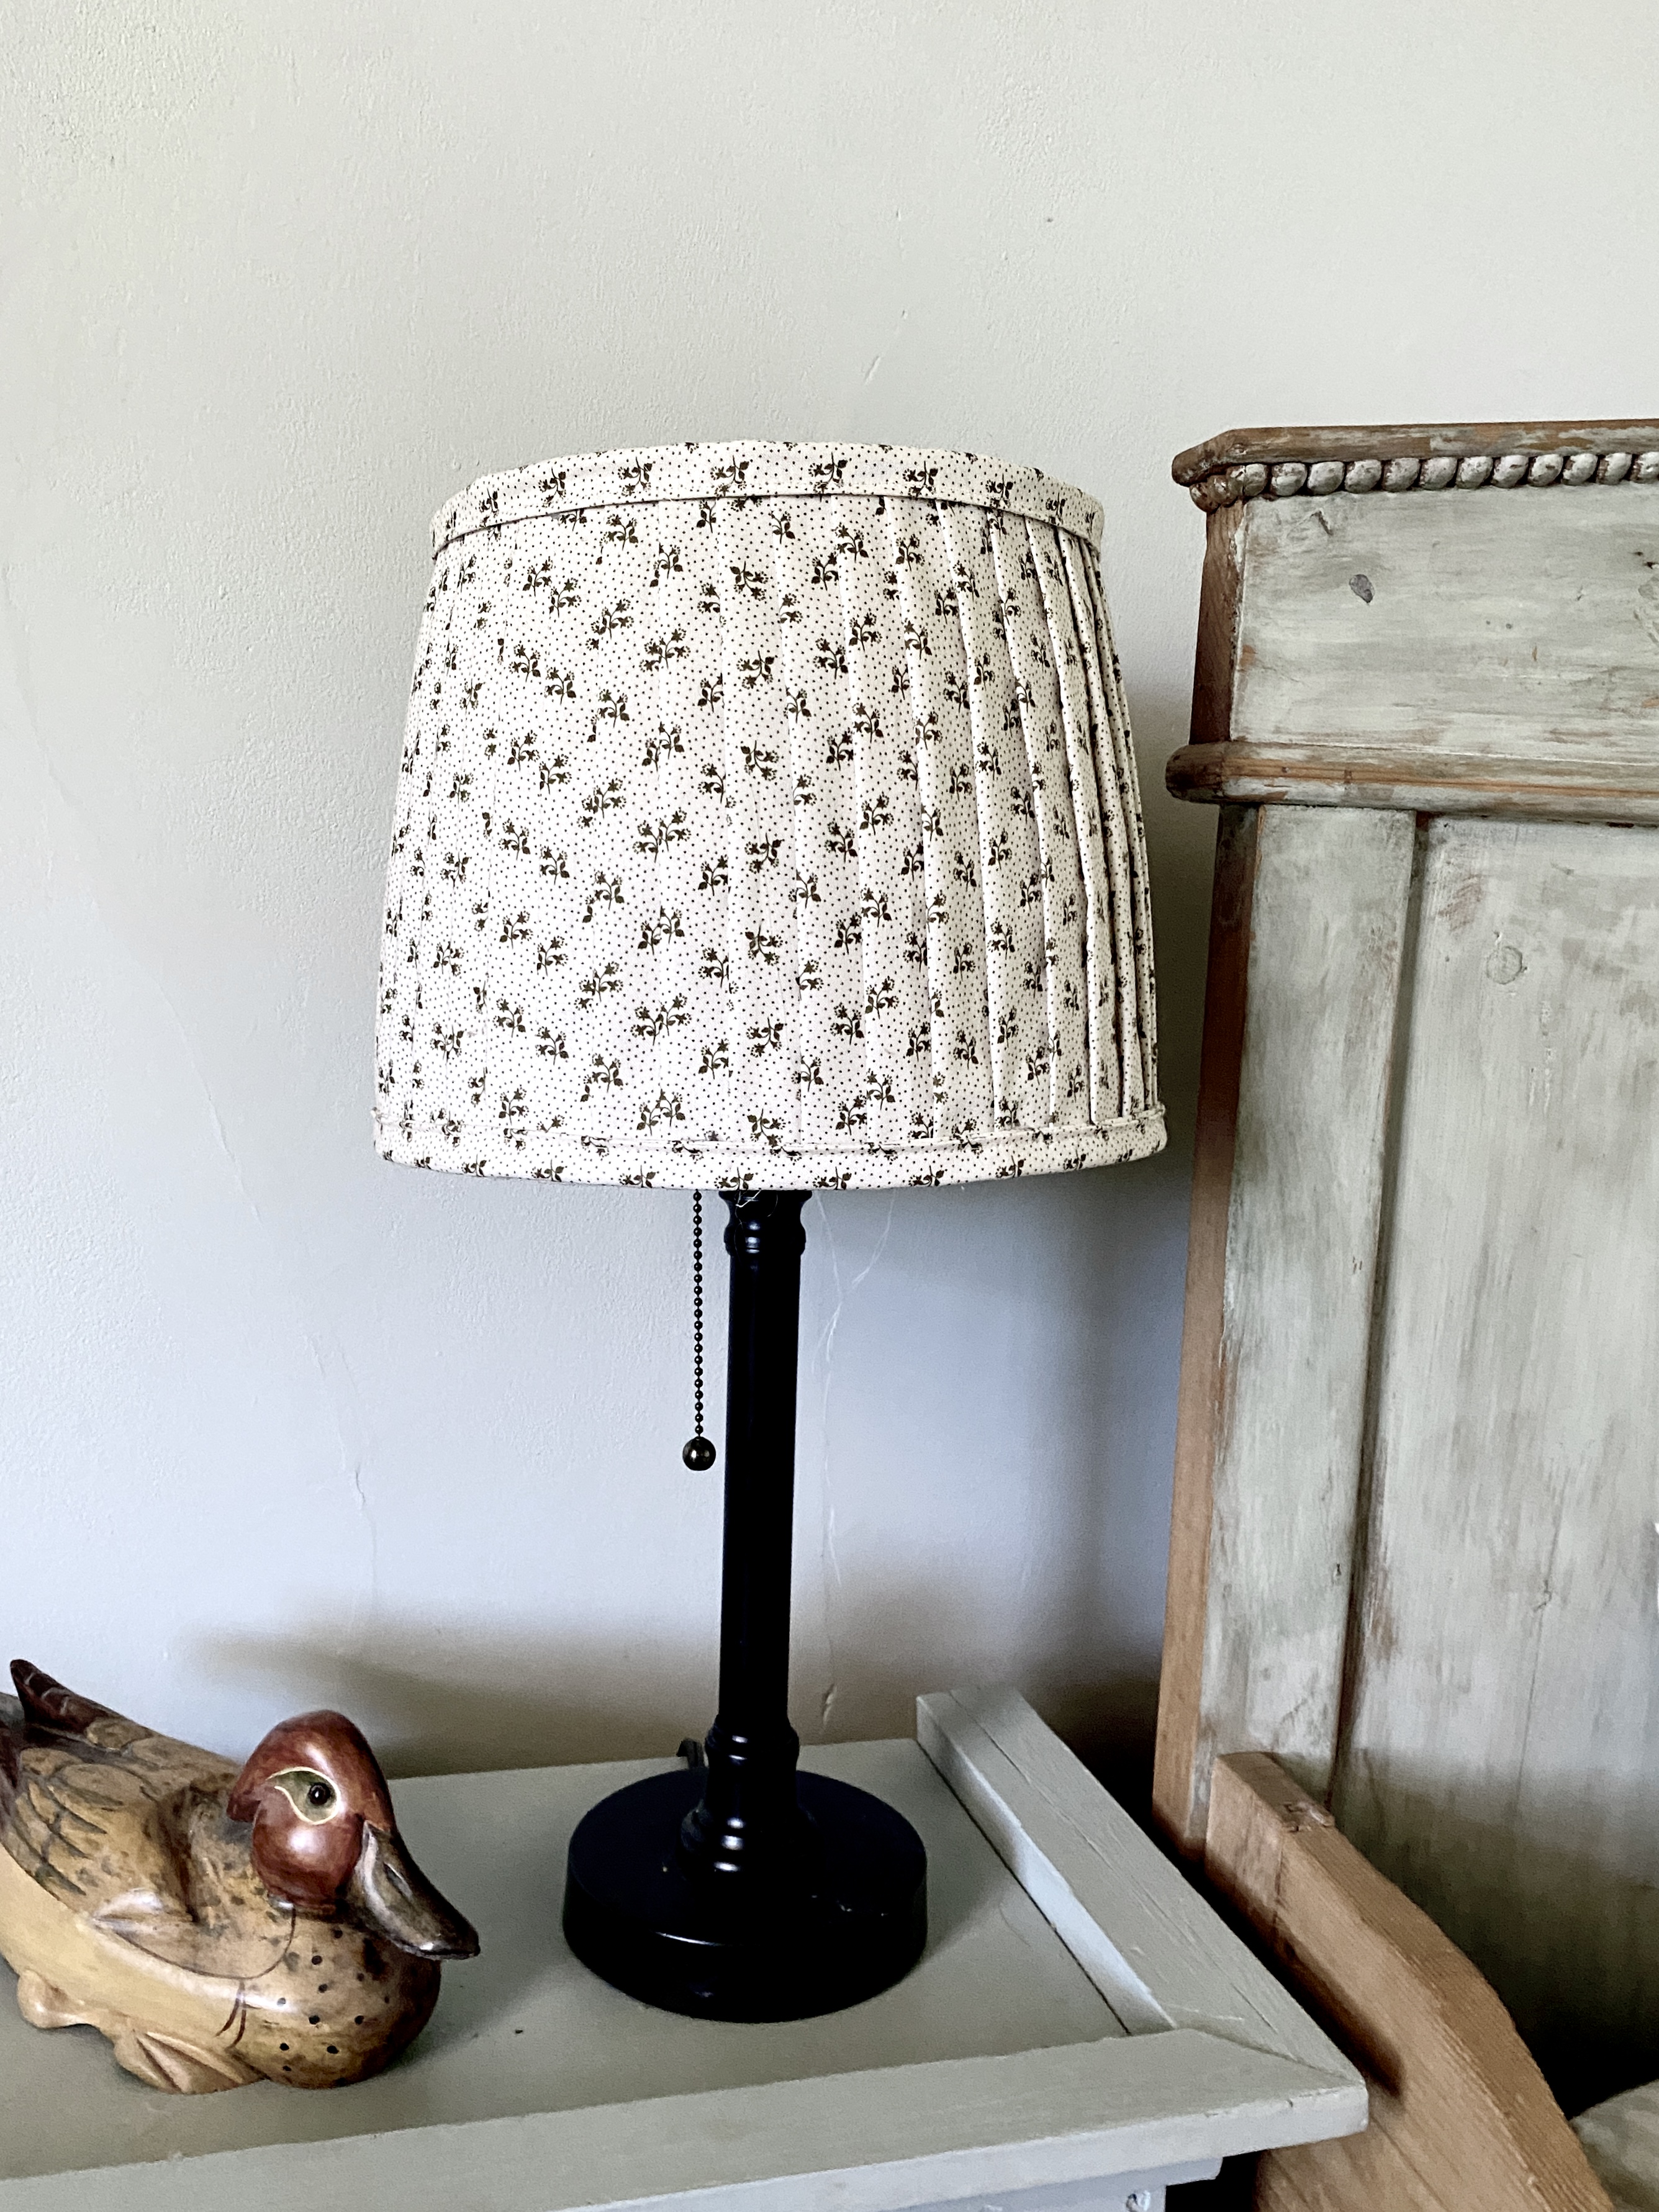
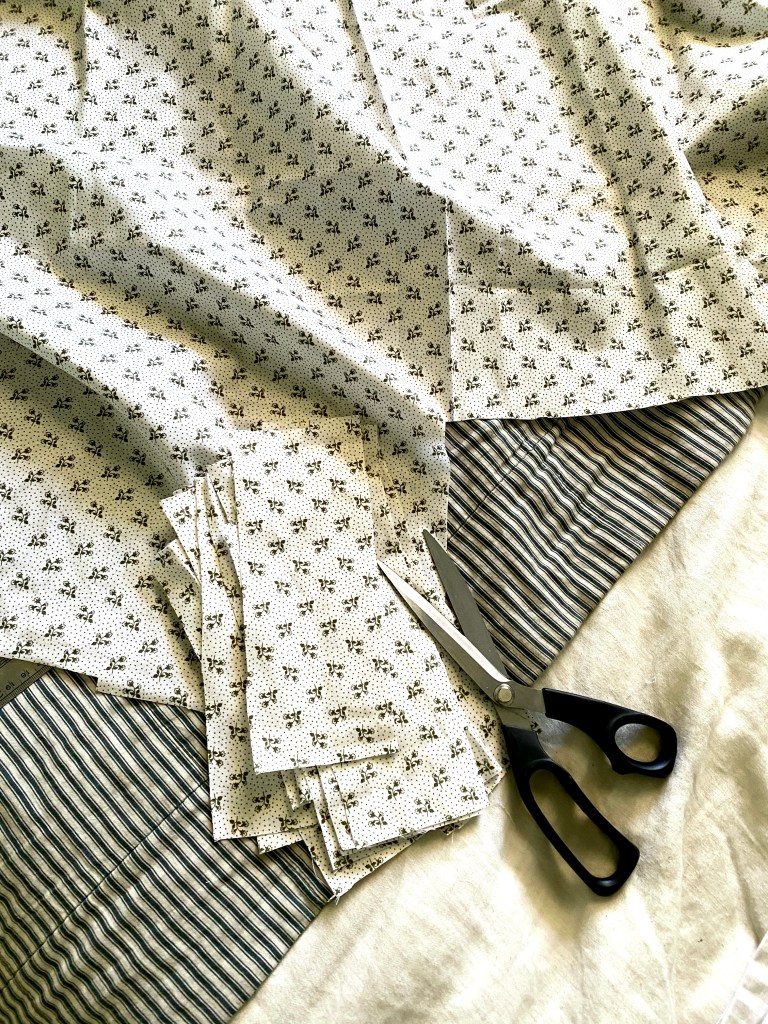
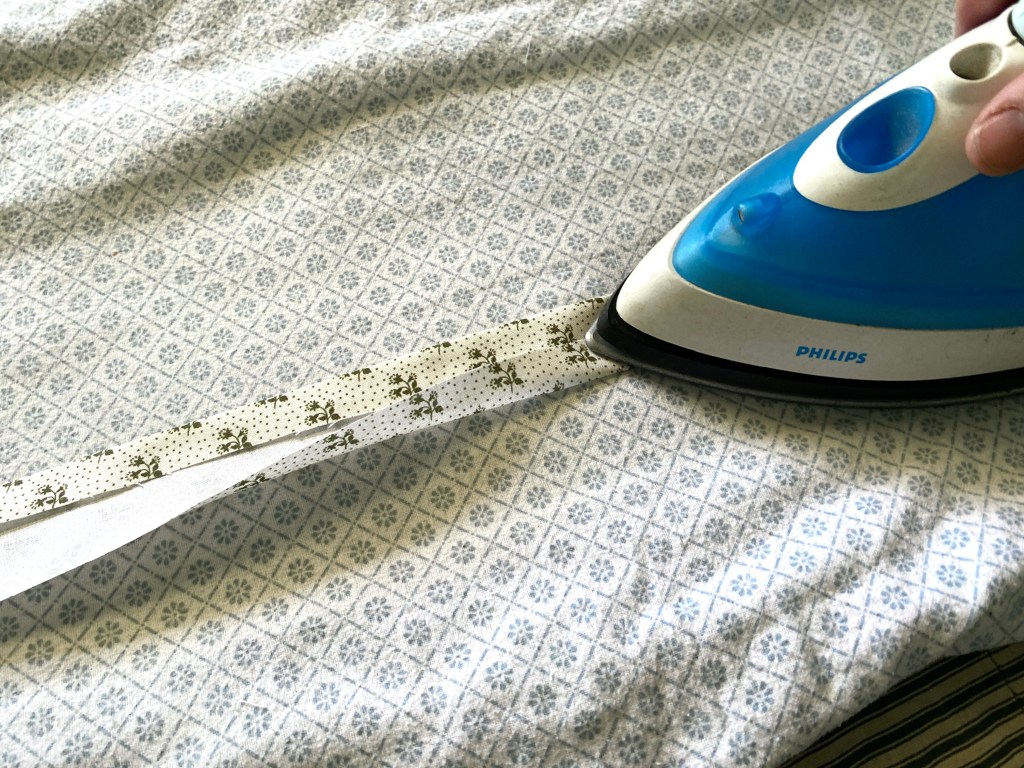
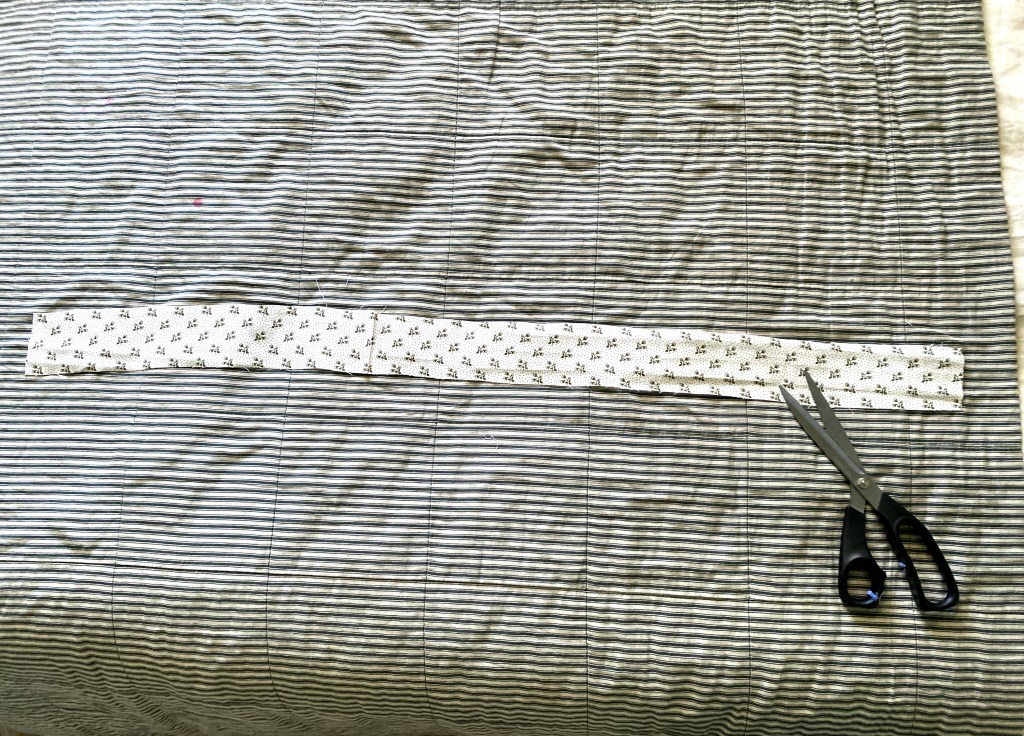
Cut fabric in 3 inch or 7.5 cm wide strips, and the length needs to be just slightly shorter than the height of your lamp shade. For the lamp I used, the strips were just under 8 inches or 20 cm long. I used the fabric’s pattern to make cutting a bit quicker while still keeping pretty straight. For this lampshade I ended up using 42 strips to cover it all the way around, and I bought about 1.5 yards or 1.5 metres of fabric.
With each strip, fold the raw edges behind and iron so the final strips were about 1.5 inches or 4 cm wide. Here’s where a pattern makes it really easy to iron them straight as you can use the pattern as a guide.

ATTACHING THE PLEATS
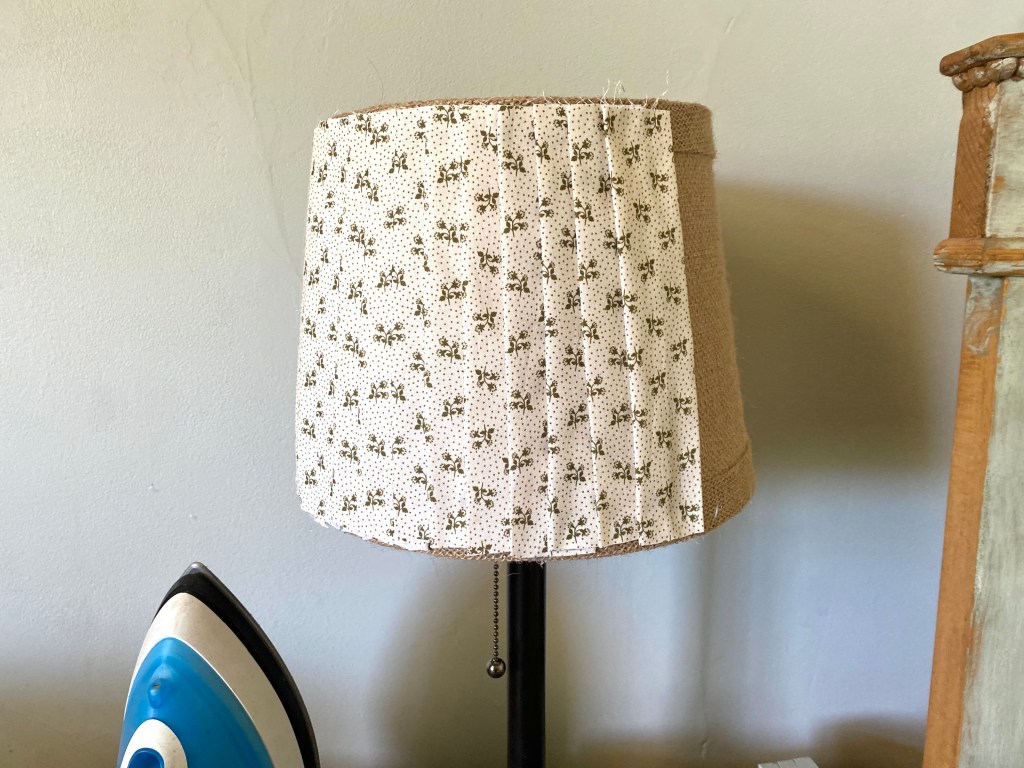
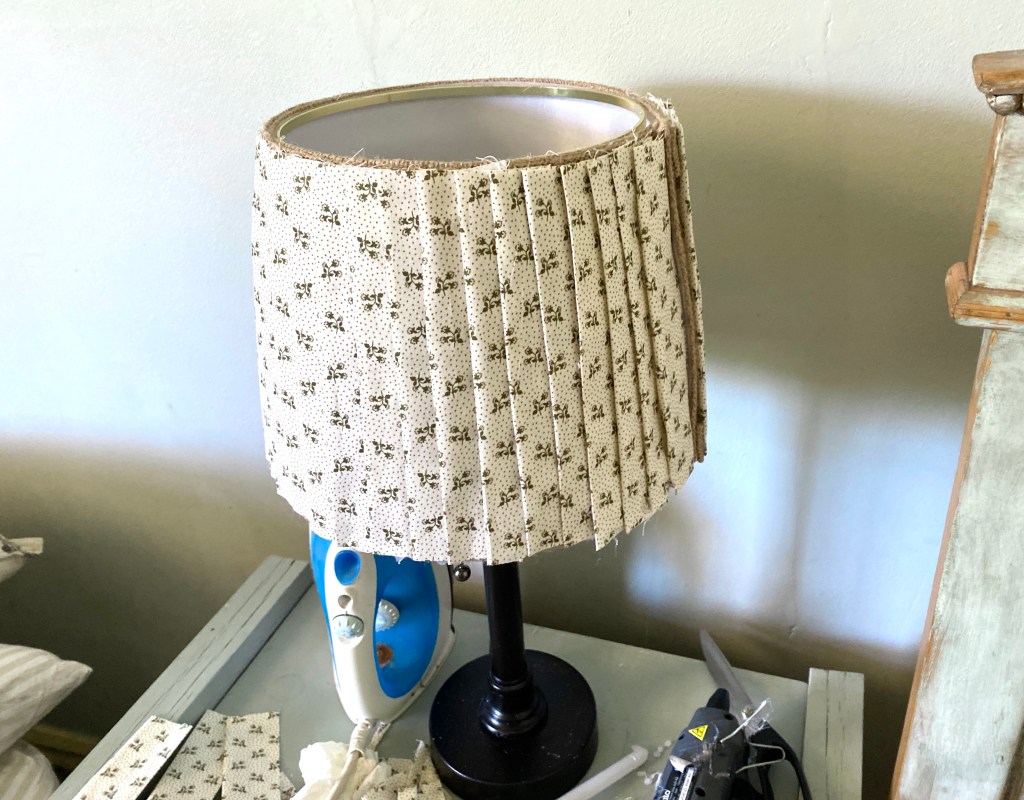
Hot-glue the ironed strips onto the shade, starting at the rear seam of the lampshade and working your way around. I used a dob of glue at the top, placing my strips about 5/8 inch or 1.5 cm apart and then another dob of glue at the bottom. Because my shade was tapered, I had to make sure the strip was perpendicular with the bottom of the shade, which meant the spacing between pleats was slightly larger at the bottom. This is pretty easy to eyeball as you go around.
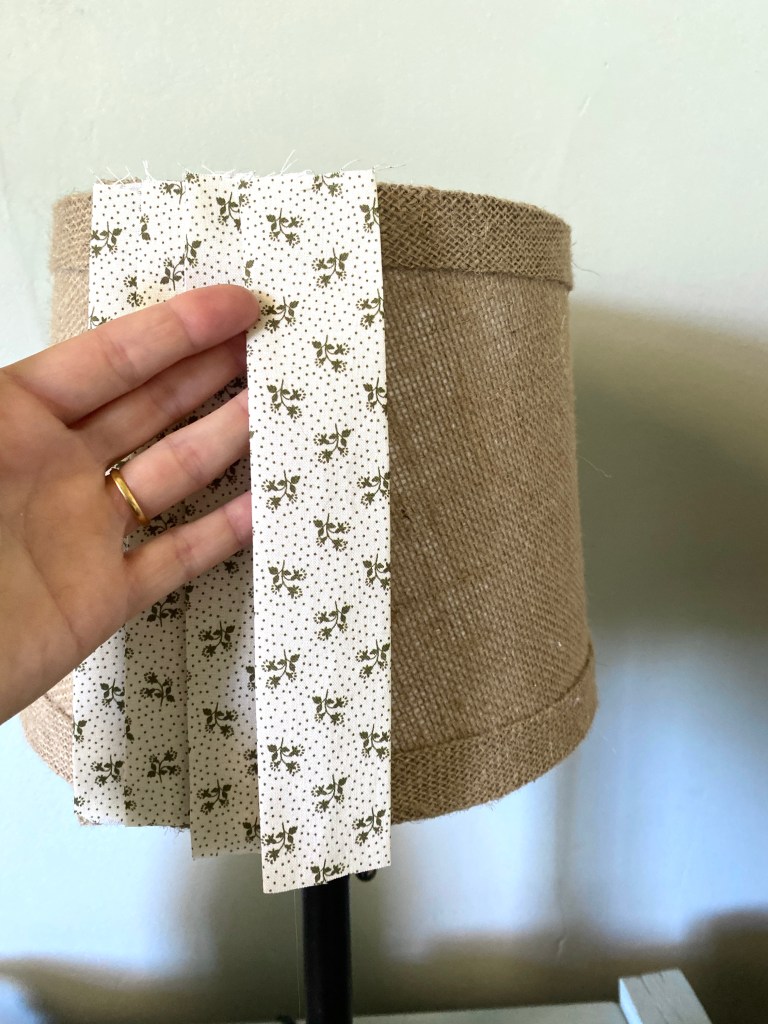
I wasn’t rigidly exact, but I did pay attention as I went around the shade because I wanted it to look generally even and straight.
FINISHING TRIM
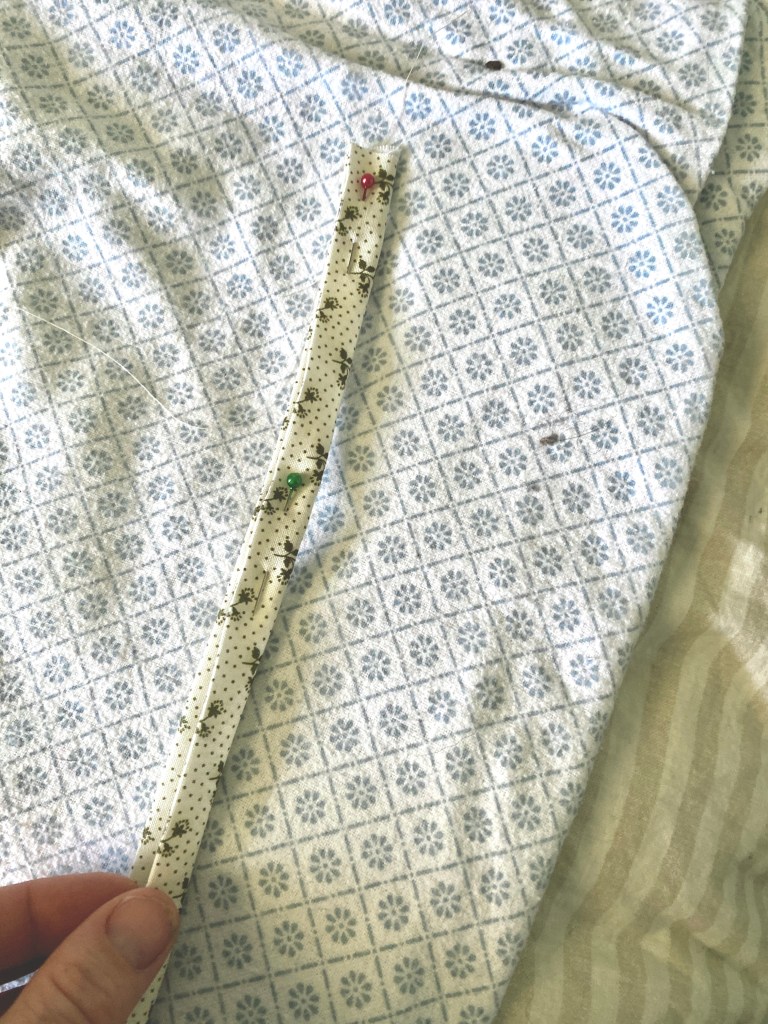
For the finishing trim, cut two longer strips of fabric a bit longer than the circumference of the top and bottom of the lamp shade. I made these ones 2.5 inches or 6.5 cm wide, and for this shade they were both about 33 inches or 85 cm long.
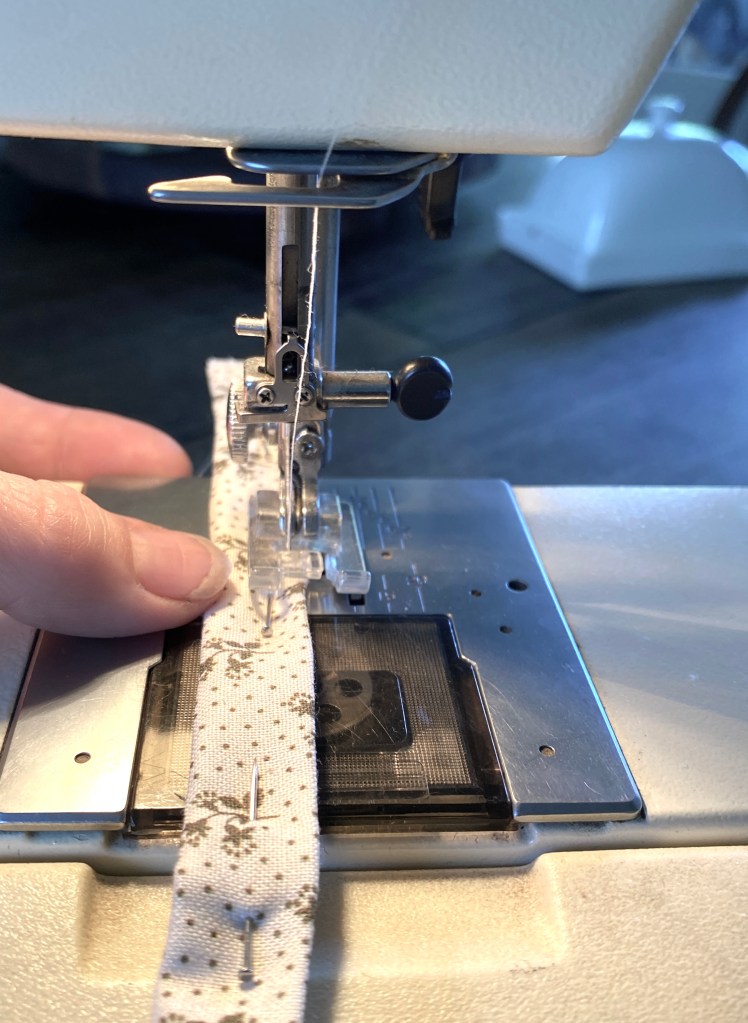
Ironed these the same as the other strips and then fold in half again and pin, so that the final trim piece is about 0.5 inch or 1 cm wide. I used a simple straight stitch on the sewing machine to make the trim look more finished, but you could just glue the strip closed if you wanted a faster result. I found the sewing only took a couple of minutes and was worth it for the effect.
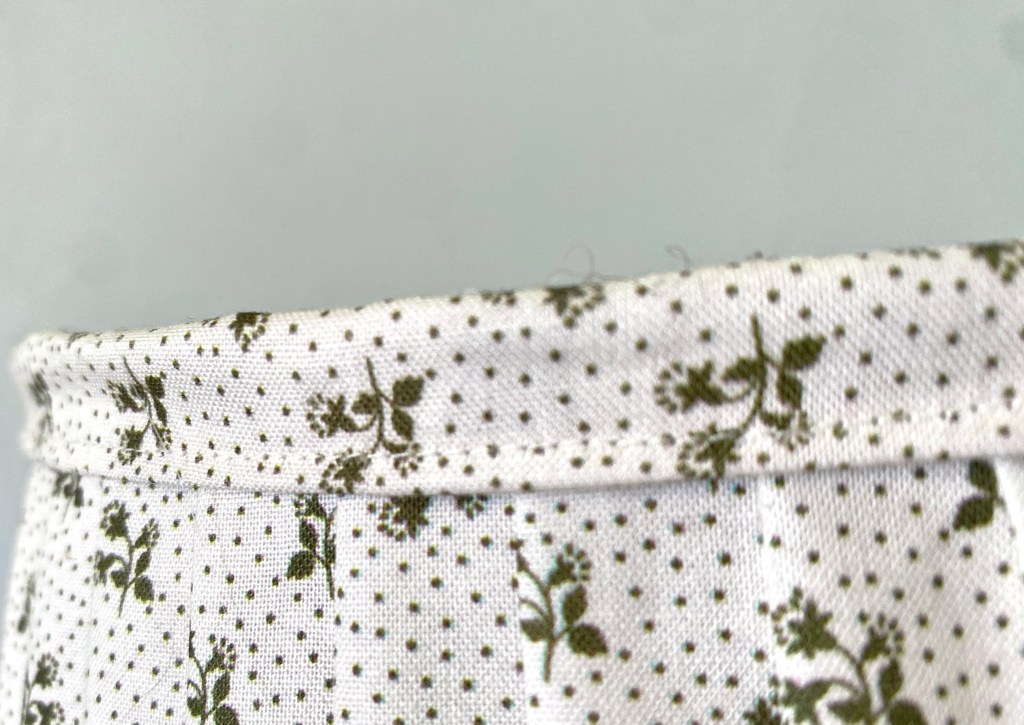
Hot glue the finishing trim around the top and bottom of the shade and tuck in and sew the ends at the rear seam if desired, and you could just glue these down.
The end result was so lovely, for such a small amount of time and effort. It was also quite a forgiving project and came together so nicely.
FAQ
- Can I use other fabric? Yes you can. I suggest lightweight cotton because it will let some light through and the natural fibre adds to the vintage, simple style of the end result, but you could experiment with different fabrics, colours and patterns to see what you like — which is what’s so great about making your own.
- What if I don’t have a hot glue gun? You could also sew your pleated lampshade, check out tutorials like this one, but most still use glue at some point to assemble.

Leave a comment